DIY: Acrylic Pouring Supplies on a Budget
Acrylic pouring is an exciting and accessible art form that allows anyone to create stunning abstract designs without breaking the bank. Whether you’re a beginner or an experienced artist looking to save on supplies, this guide will show you how to gather everything you need for acrylic pouring on a budget.
FLUID ART
12/8/20243 min read
DIY: Acrylic Pouring Supplies on a Budget
Acrylic pouring is an exciting and accessible art form that allows anyone to create stunning abstract designs without breaking the bank. Whether you’re a beginner or an experienced artist looking to save on supplies, this guide will show you how to gather everything you need for acrylic pouring on a budget.
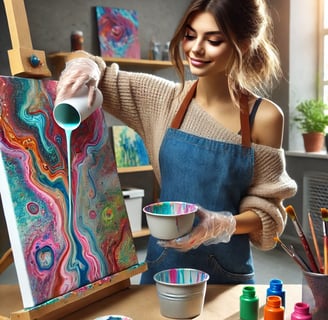
Hi! I’m Karen, a passionate fluid artist who loves exploring the creative and therapeutic world of acrylic pouring. One of the best things about this art form is its affordability—anyone can get started without spending a fortune.
In this guide, I’ll share practical tips and tricks for sourcing budget-friendly supplies and creating your own DIY pouring mediums, so you can dive into this art form without worrying about your wallet.
Essential Supplies for Acrylic Pouring
1. Paint
Acrylic paints are the cornerstone of any pour. To stay within budget:
Choose craft paints: Brands like Apple Barrel, FolkArt, and DecoArt offer vibrant colors at affordable prices.
Buy larger bottles for common colors: White and black are often used as base colors, so purchasing larger containers can save money.
Thin paints effectively: Use water or a homemade pouring medium to get the right consistency without investing in expensive premixed options.
2. Additives
Additives help create unique effects like cells and lacing in your pours:
Floetrol: A popular and affordable pouring medium available at hardware stores.
Silicone oil: Easily found in hardware or automotive sections, this additive is key for creating cells.
Alcohol inks: These can be used to add pops of vibrant color. Alternatively, consider food coloring or dye as a cheaper option.
3. Canvas and Other Materials
You don’t need expensive canvases to create beautiful art:
Affordable canvases: Check for bulk packs at craft stores or online retailers.
Alternative surfaces: Try wood panels, glass, tiles, or even cardboard for a budget-friendly base.
4. Tools and Protective Supplies
To make your pouring experience smooth and mess-free, gather these additional essentials:
Stirring sticks: Wooden popsicle sticks or plastic spoons from dollar stores work well for mixing paint and additives.
Mixing containers: Reuse disposable cups or yogurt containers for mixing paint.
Gloves: Latex or nitrile gloves protect your hands from paint and additives, which can sometimes be hard to wash off.
Apron or old clothes: Acrylic pouring can get messy! Protect your clothes with an apron or wear something you don’t mind getting paint on.
Plastic sheet or drop cloth: Cover your workspace to protect it from spills and drips. Dollar-store plastic tablecloths work perfectly.
Palette knife or spatula: Handy for spreading paint or making adjustments on the canvas.
Push pins or small stands: Elevate your canvas slightly to prevent the paint from pooling underneath.
Torch or heat gun: Optional but useful for popping air bubbles and enhancing cell formation. You can also use a kitchen torch as a budget option.
By ensuring you have these supplies on hand, you’ll be prepared for a smooth, enjoyable acrylic pouring experience while keeping your costs low.
Where to Find Affordable Supplies
1. Online Retailers
Websites like Amazon, Etsy, and specialty craft supply shops often have deals or discounts, especially during sales events. Use coupon codes and subscribe to newsletters for exclusive offers.
2. Local Craft Stores
Major chains like Michael’s, Hobby Lobby, and Joann often have weekly sales and coupons. Stock up during sales, especially for essentials like canvases and paints.
3. Thrift Stores and Second-Hand Shops
Thrift shops can be a treasure trove for unconventional pouring surfaces. Look for:
Picture frames with glass inserts.
Old dishes, plates, or wooden panels.
Unused paint from garage sales.
Creating a Budget-Friendly Pouring Palette
1. Prioritize Key Supplies
Focus on essentials: paints, a mixing medium, and a surface to pour on. You can upgrade or expand your supplies as you develop your skills.
2. DIY Pouring Medium
Make your own pouring medium by mixing PVA glue with water (2 parts glue to 1 part water). It’s an effective and low-cost alternative to commercial options.
3. Creative Substitutes
Substitute where you can:
Replace silicone oil with WD-40 spray (containing silicone).
Use old plastic cups or yogurt containers for mixing instead of buying new ones.
Cover your workspace with an old shower curtain or dollar-store tablecloth.
Conclusion
Acrylic pouring is an art form that doesn’t require a hefty investment. By prioritizing essential supplies, exploring creative substitutes, and shopping smartly, you can create stunning artwork on a budget.
Now it’s time to get pouring! Share your creations, experiment fearlessly, and follow me for more tips and techniques to make your fluid art journey both fun and affordable.