Creative Ways to Embellish Your Fluid Art Paintings: Transforming Disappointments into Masterpieces
Discover creative ways to transform your fluid art paintings with acrylic markers, stencils, stickers, and more. Learn how to embellish your fluid artwork and turn disappointments into masterpieces, plus tips for enhancing designs digitally for Print on Demand platforms like Redbubble.
FLUID ART
9/6/20246 min read
Creative Ways to Embellish Your Fluid Art Painting - Transforming Disappointments into Masterpieces
Fluid art, a mesmerizing and popular art form, captivates the imagination with its spontaneous swirls, vibrant colors, and organic patterns. However, as with all forms of artistic expression, the result doesn’t always turn out as planned. Some fluid art paintings may leave you feeling disappointed, wondering if they’re worth keeping. But what if those seemingly imperfect pieces could be transformed into unique masterpieces with a little embellishment?
In this blog post, we’ll dive into creative ways to elevate your fluid art paintings, from adding personalized designs with acrylic markers to experimenting with stencils, stickers, and more. Whether your piece didn’t turn out as expected or you’re just looking to add an extra dimension to an already beautiful work, these embellishment techniques will inspire you to see your fluid art in a new light.
What is Fluid Art?
Fluid art, often referred to as acrylic pouring, is a technique where paints are mixed with a medium to make them fluid enough to pour, drip, or swirl onto a surface without the use of brushes or other traditional tools. Artists typically use canvases, but fluid art can be done on a variety of surfaces, including wood panels, tiles, and even three-dimensional objects.
What makes fluid art so alluring is the randomness and unpredictability of the results. The colors mix and flow together in fascinating ways, creating natural, abstract patterns that are unique and almost impossible to replicate. However, due to the uncontrollable nature of this method, not all pieces turn out as the artist envisioned. This is where embellishments come into play — taking a piece that may have fallen short and elevating it into something more personal and intentional.
Now, let’s explore some innovative ways to embellish your fluid art paintings and transform those “disappointments” into stunning, one-of-a-kind masterpieces.
1. Add Intricate Designs with Acrylic Markers
One of the simplest and most effective ways to enhance a fluid art piece is by adding fine details with acrylic markers. Acrylic markers allow for more precision than a traditional brush, making them ideal for drawing intricate designs on top of your existing artwork.
How to Use Acrylic Markers:
Choose Your Colors: You can either select colors that complement the existing palette of your painting or opt for bold contrasting hues that stand out. Metallics like gold, silver, or bronze can add a striking touch.
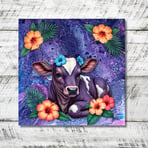
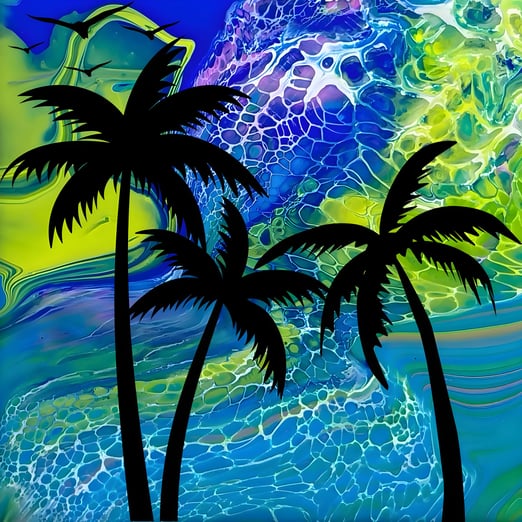
Outline Shapes: Your fluid art may already suggest shapes or figures within its abstract forms. Use these natural shapes as a guide to outline with acrylic markers. You can trace around swirls, cells, or blobs to add emphasis to certain areas.
Create Geometric Patterns: If your fluid art feels too chaotic, adding geometric designs can help create structure and contrast. Try drawing mandalas, spirals, or simple grid-like patterns to give the painting a more defined focal point.
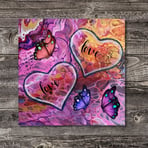
Personal Symbols: Turn your fluid art into a more personal piece by adding symbols, words, or meaningful shapes. You could write inspirational quotes, draw nature-inspired motifs (like leaves or waves), or even doodle abstract shapes to create a unique juxtaposition between fluidity and control.
Acrylic markers offer endless possibilities for personalization, and they’re a great way to connect more deeply with your art by adding your own creative touch.
2. Incorporate Stickers for a Fun, Playful Touch
Stickers are an underrated yet powerful tool when it comes to embellishing fluid art. They can add a playful, whimsical element, or help you transform the overall theme of your painting.
How to Use Stickers in Your Fluid Art:
Choose a Theme: Stickers come in an array of designs and themes, from florals and animals to abstract geometric shapes. Pick stickers that resonate with your personal style or that complement the theme you want to bring out in the painting.
Highlight Specific Areas: If parts of your painting feel bland or too busy, stickers can direct the viewer's attention to specific areas. Place them strategically where they’ll enhance rather than overwhelm the piece.
Add Texture or Shine: Some stickers have raised surfaces or metallic finishes that can add a three-dimensional or shiny element to your painting. These can break up the flatness of the poured acrylic and add more texture and visual interest.
Create a Mixed-Media Effect: Pairing stickers with other embellishment techniques (like acrylic markers) can create a mixed-media masterpiece. You can use stickers to create new layers on your painting, making it feel more dynamic and multi-faceted.
3. Use Stencils to Add Defined Designs
Stencils offer another way to bring definition and structure to your fluid art. They allow you to apply clean, sharp designs on top of the organic flow of your pour, which can create a stunning contrast between the natural and the deliberate.
How to Use Stencils:
Select Your Stencil Design: Choose from a wide range of stencil designs, from intricate patterns like mandalas or florals to simpler shapes like stars or circles. Select something that complements or enhances the existing patterns in your pour.
Use Contrasting Colors: Apply your stencil with acrylic paint, spray paint, or even metallic leaf for added texture. Choose colors that either blend harmoniously with your background or stand out to create a striking contrast. For example, using white or black paint over a vibrant pour can help the stenciled design pop.
Layer with Other Techniques: Stencils work beautifully with other embellishments. After applying a stencil, you can outline the design with acrylic markers for extra definition or use stickers to add more layers and depth.
Stenciling gives you the opportunity to bring symmetry, repetition, or structure to an otherwise free-flowing painting.
4. Apply Foil for a Luxe Finish
If you’re looking to add a touch of glamour to your fluid art, incorporating metallic foil is a fantastic option. Gold, silver, and bronze foils create a luxurious, high-end look, instantly elevating your piece.
How to Use Foil:
Prepare Your Surface: Start by applying an adhesive, such as gilding glue, to the areas of the painting where you want to apply the foil. This could be random patches or specific shapes that you want to highlight.
Apply the Foil: Gently press the foil sheets onto the adhesive and then peel away the backing. The foil will stick to the glued areas, leaving behind a shimmering metallic finish.
Blend with Your Painting: Once the foil is applied, you can use acrylic markers to further integrate the foil into the painting, or leave it as a bold highlight. Foil can be used to draw attention to specific parts of the painting, or to add a luxurious sheen to the overall piece.
5. Experiment with Textures and Mixed Media
One of the most exciting ways to embellish fluid art is by adding texture. Incorporating different materials into your painting can give it a tactile quality and bring new depth to the artwork.
Ideas for Adding Texture:
Modeling Paste or Texture Gel: Apply modeling paste or texture gel with a palette knife to create raised areas on the painting. You can create abstract, textured shapes or use stencils to apply the paste in specific patterns. Once dry, you can paint over these textured areas to integrate them into the overall composition.
Collage Elements: Incorporate collage elements like torn paper, fabric scraps, or natural objects like leaves and pressed flowers. These materials can be glued to the canvas and painted over to become part of the piece. This technique adds dimension and an eclectic, mixed-media feel to the painting.
Raised Metallic Elements: Use 3D paints or dimensional fabric paints to create raised metallic details that pop off the canvas. These can be used to outline shapes or to add accents and highlights throughout the piece.
6. Final Touches: Sealing and Displaying
Once you’ve embellished your fluid art piece, it’s essential to seal it to protect the newly added elements. A clear gloss or matte varnish will protect the surface from dust and UV damage, while also giving your piece a professional, finished look.
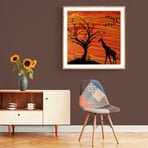
For displaying your art, consider how the embellishments change the overall vibe of the piece. Bold and textured artworks might look best in simple frames that don’t detract from the piece itself, while lighter, whimsical works could benefit from more ornate framing.
Conclusion
Fluid art is all about embracing the unpredictable, and that can sometimes lead to unexpected results that don’t always match your vision. However, with the right techniques, you can turn any piece into a stunning, personalized masterpiece. Whether you’re using acrylic markers to create intricate designs, incorporating stickers and stencils for added interest, or experimenting with texture and foil for a luxe finish, embellishing your fluid art opens up a world of creative possibilities.
Next time a pour doesn’t turn out as planned, instead of discarding it, see it as an opportunity for further artistic exploration. Each “disappointment” is a canvas for your imagination to take flight. The only limit is your creativity!
Bonus Tip: Embellishing Fluid Art for Print on Demand
For artists who use fluid art designs on Print on Demand platforms like Redbubble, digital embellishments can take your work to another level. Once you've photographed or scanned your fluid art piece, you can upload it to a design tool such as Photoshop or Canva, where you have endless possibilities for enhancing your artwork. Digital embellishments allow you to overlay intricate patterns, add text, or incorporate vector graphics to create even more unique designs. You can also adjust and enhance the colors to make them more vibrant, contrast with other elements, or fit specific product themes. Whether you're adding metallic textures, layering abstract designs, or tweaking hues, digital embellishments provide a professional polish, ensuring your fluid art looks stunning on a wide range of products like apparel, home decor, and stationery. This is a fantastic way to expand your creative expression while reaching a larger audience in the digital marketplace.